Installing the BlueStacks emulator
If everything went right then you are now left with a file called BlueStacks-SplitInstaller_native(.exe). Open this file, and confirm any warnings with Yes or I agree. Install the program as you would normally install a program. The BlueStacks program will start right after the setup.
Installing WhatsApp in Bluestacks
Good, we now have an Android emulator installed on the computer. Now it’s the time to install WhatsApp. Make sure you have BlueStacks opened up, and on the home screen, select the WhatsApp shortcut. If it is not there, search for it.

Click the WhatsApp icon or search for WhatsApp if the icon is not there.
If you get prompted with the One-time setup window, click continue, and authenticate with your Google account. If you already have a Google account, click Existing. If not, click New.
If the keys you are pressing on your keyboard don’t match the ones appearing on the screen, please see this article on changing the keyboard layout in BlueStacks.
Authenticating with your Google account will give you access to the Google Play Store, so you can download all the apps available for Android!
After authenticating, you will be taken to the official WhatsApp download page. Click the Install button.
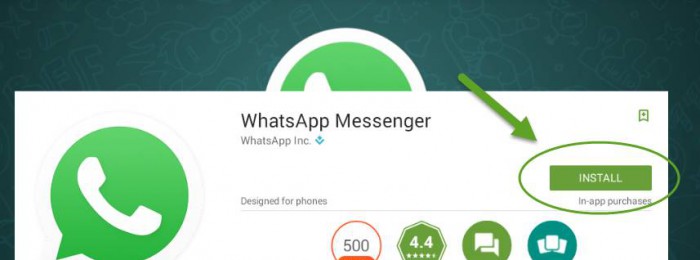
Click the Install button on the WhatsApp download page in BlueStacks
If you get asked to supply payment details, you can skip this if you want.
Click accept on the permissions screen (know what you are getting into, haha!).
WhatsApp will be installed, and will immediately open up. If not, press the Home button on the bottom left corner of the BlueStacks screen and manually open it.
If for any reason the download through BlueStacks is not working, you can manually download the app from the WhatsApp website. BlueStacks will recognize the .APK file and install it for you.
Next page: Configuring WhatsApp >>